Managing items within a link resource group
All sites have pieces of content called “link resource groups” that are made up of “link resource items”.
Getting to your link resource group
For the sake of an example, we’ll use the school resources pages found on Elementary and Middle School websites.
Clicking on the “school resources” tab in the navigation is the easiest way to edit items. Remember, if you’re really lost on where a link resource group is, use the find content feature.

Editing a pre-existing link resource item
To edit an item that is already on the page, hover over the individual item on the list.

Then, click on “edit”. Just like most other content on your site, you can go in and fill out each of the fields with new content.
Hit save once you’re finished.
Adding a new item to a link resource group
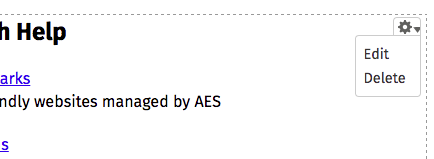
To add a completely new item to the list, hover over the entirety of the list, then click on the editing cog.

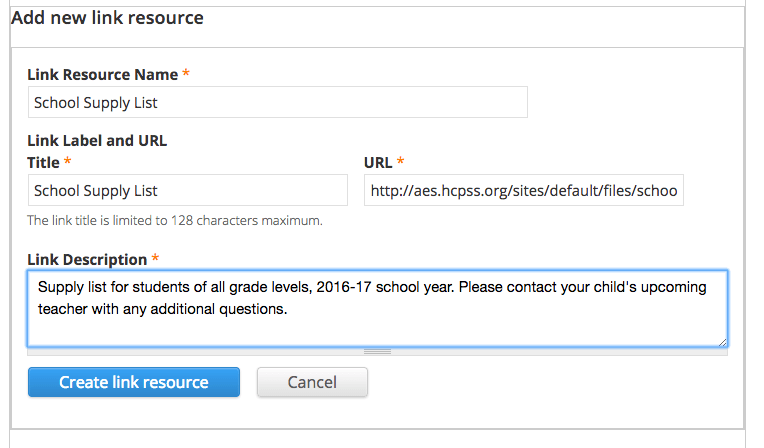
From there, you can click on “add new link resource”.

You can now edit the link resource name (e.g., MackinVia) and the title, which are both the same.
The URL is for a link to either a document or external website.
-
If you’re unfamiliar with how to get links to PDFs that you’ve uploaded, feel free to review that help topic.
-
Take a look at how to get link to external webpages such as MackinVia and other sites if you’re unfamilar.
Once you’ve uploaded the file, drop in the URL that was generated for the file into the URL field. It’s reccomended that you add a description for the link resource. This will help users better understand the scope of the link and can provide any other helpful information to them.

After you’ve made your changes, hit “create link resource” and then “save”.